Next Steps, Basic Beginner
Ok, you’ve run Forth using a off-the-shelf board, made a led blink, have basic embedded understanding, what should you do next ?`
This is a EMBEDDED Mecrisp-Stellaris site, so that means your next step is to:
Make a hand wired circuit board with a Blinky
Note
Getting a pcb made, whilst quite easy, inexpensive and fun, can bypass a lot of hand construction skills that the beginner should develop. It’s also more expensive and involves time delays waiting for your board. Prototyping is about ONE handmade unique board, not a batch of 10 size limited PCB’s for $20 from China.
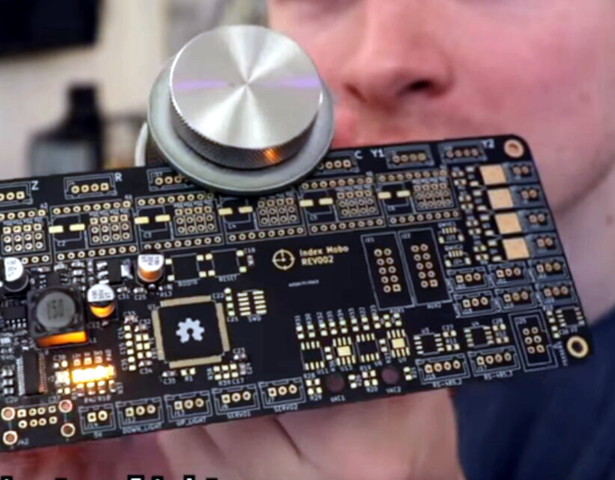
Embedded board prototyping, examples.
Stuff You Will Need
Surface Mount Components
Cutting, drilling, holding using purpose made equipment and hand tools
Soldering
Binocular microscope
Flashing your binary
Connecting a terminal
Testing/verifying a standalone device
WHAT ?! I came here to learn Embedded Forth, I don’t have the time or money to do this shit!
Fair enough, Embedded Electronics is not for everyone.
Perhaps Mecrisp-Stellaris on the PC (see your Mecrisp-Stellaris distribution) or a really awesome Forth on the PC like RETRO Forth may suit your programmer only skills and aspirations. In any event, embedded electronics is probably not for you at this time.
Soldering

I’ve never soldered before !
Have you eaten using chopsticks ? Soldering uses similar skills. There are many ways to learn soldering.
Join a Makerspace
Buy a soldering practice kit online
Leaded or Unleaded Solder
While the law in most countries require manufacturers to use unleaded solder, this is NOT the case with hobby or repair work. Personally I ONLY use leaded solder for all my work.
Lead-free solders tend to melt at high temperatures of about 217°C/422°F. But that’s not the case with lead-based solders. These require temperatures of 183°C/361°F.
Good site for solder (unleaded v/s leaded) advice
- Won’t I die from the lead fumes etc ?
I haven’t and I’ve been soldering using leaded solder for 59 years so far. Use a small battery powered fume extractor fan, they work like magic.
What kind of iron should I buy ?
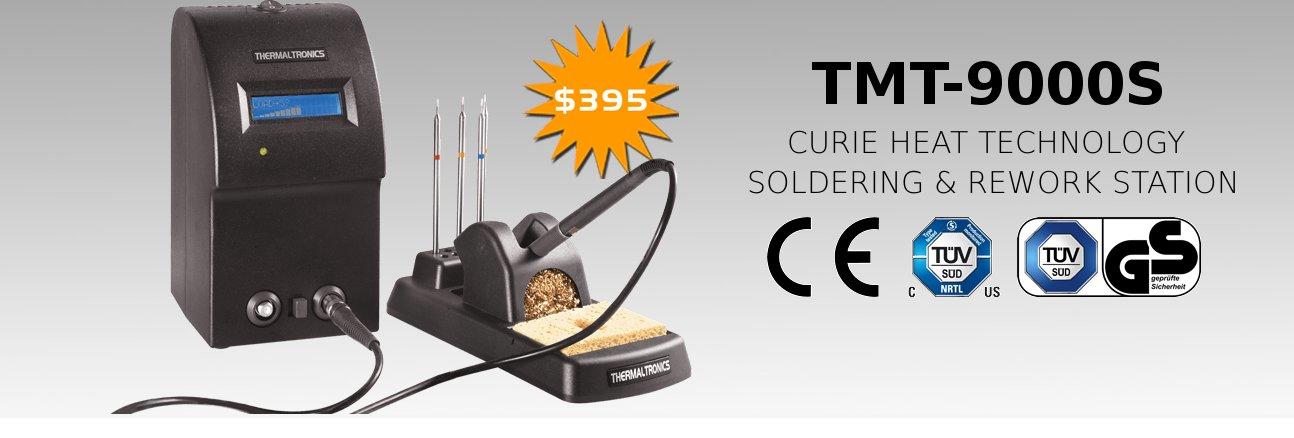
Professional; on all day, hard working Thermaltronics-tmt-9000s or similar. It’s a half price clone of a Metcal Iron and uses the same MASSIVE range of cartridge tips, easily swapped while hot.
Hobby/professional: Hakko FX888D Soldering Station. Comprehensive cartridge tip range, variable temperature, NON cartridge tips. great iron ~$170 AUD
Hobby, limited use: A TS100 variant for those on a budget, such as the PINECIL soldering iron, cartridge tips.
Assemble your own top end JBC Cartridge Iron.
Metcal/Thermaltronics Soldering Iron
The Metcal is considered by most to be the premier RF heating, Curie Point control iron. Features such as auto ‘standby’ low temperature mode when the iron is in the stand make this iron worry free. I have owned the cheaper Thermaltronics-tmt-9000s version for about the last 12 years.
The tips. This iron takes both Thermaltronics and Metcal cartridge soldering iron tips, the widest range you’ll ever see in a soldering iron.
The iron handle power cable is thin, silicon and very flexible
Iron handle itself, it’s pencil thin and runs at room temperature, all day.
Connectors for two irons, so a fast switch over is easily done, just slide a switch to do it.
RF tip heating, a heater coil is in EACH CARTRIDGE TIP, so no worrying about a burnt out heater element 10 years after buying the unit.
How many Tips should one buy ? As many as you can, this iron will last a lifetime, but the tips won’t. Avoid supply chain issues.
Nothing to adjust, the cartridge type sets the temperature which can vary from 575°F/302°C to 925°F/496°C in four cartridge ranges.
Features low temperature STANDBY when the iron is parked in the stand, no switch or wires, there is a magnet in the cartridge path.
FAST, solders when pulled from the stand to the job, no waiting, no delay.
Thermaltronics are about 1/2 the price of Metcal.
After you have wasted money on junk soldering irons (you can’t get new tips 12 months later), you’re going to get a decent one like this anyway, so why not save money in the long term and get a good one first ?
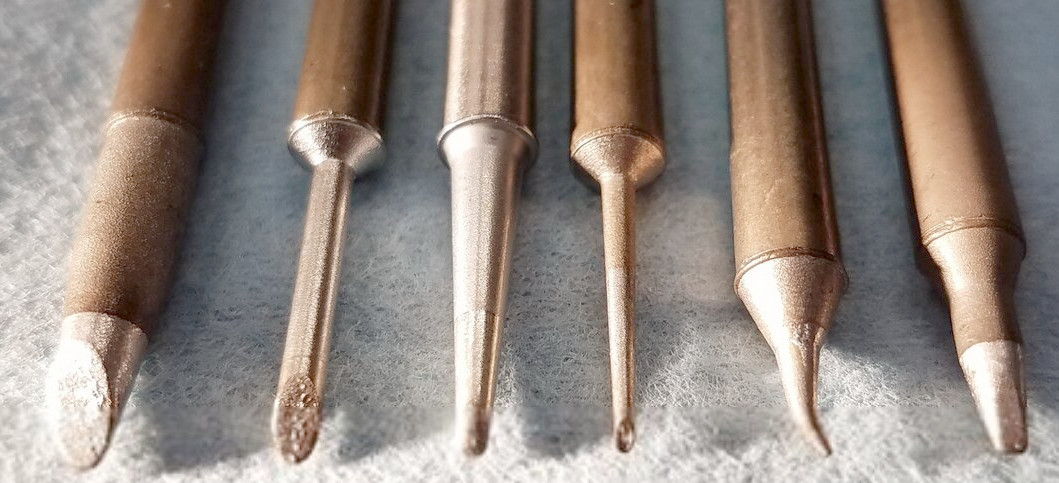
Used Metcal cartridge tips
The full range is MUCH larger, every tip you will ever need. The bent nose tip is 0.4 mm in diameter but they make tips down to 0.25mm !
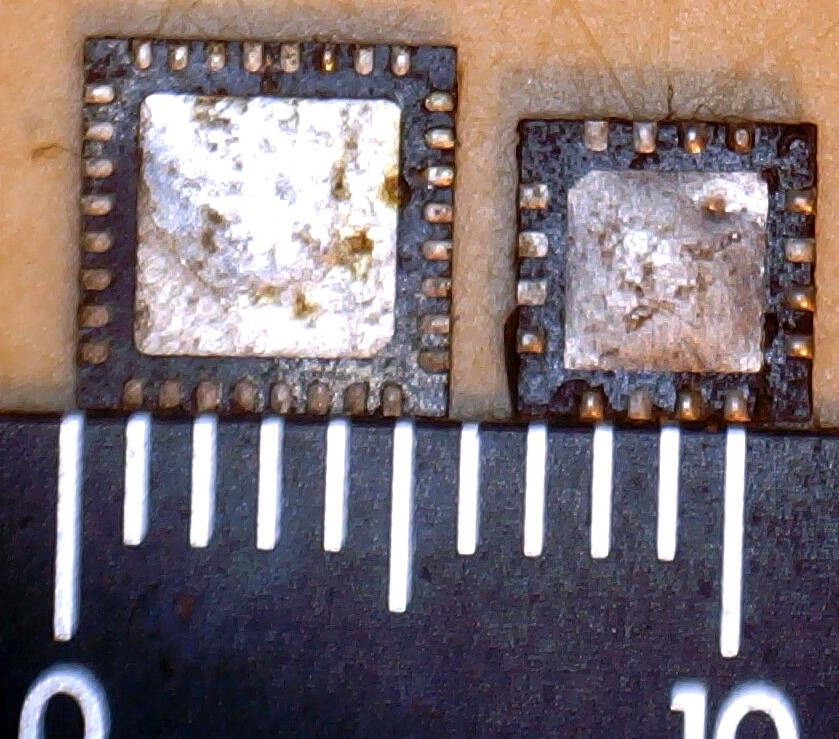
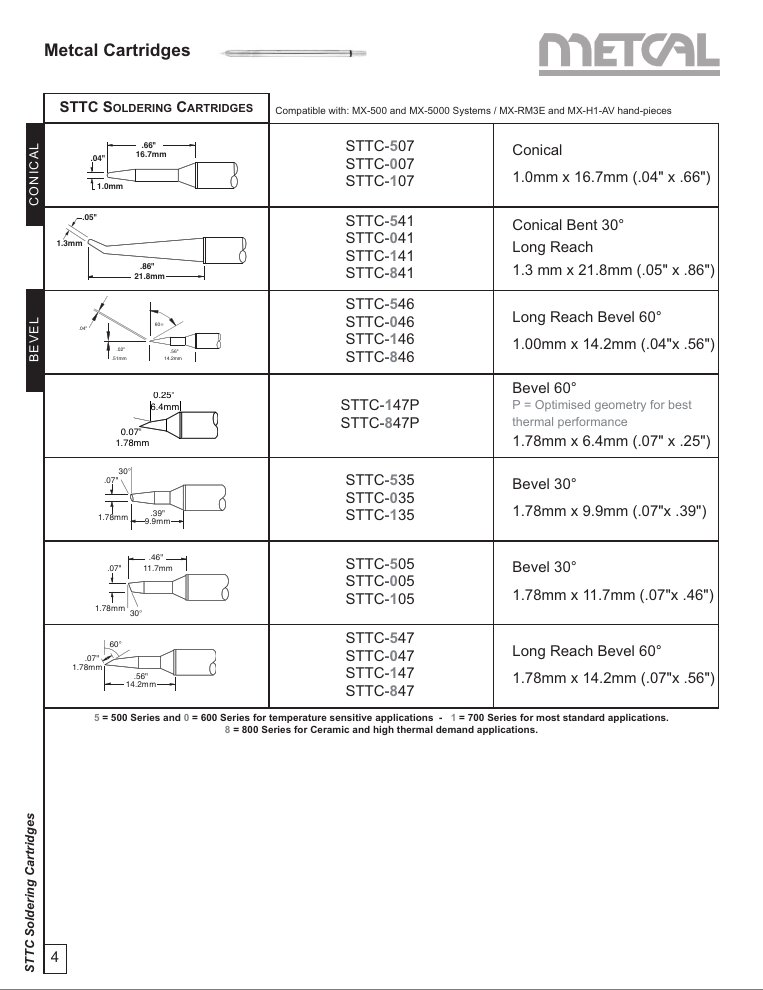
UFQFPN-32 V/S Metcal STTC-545 Tip
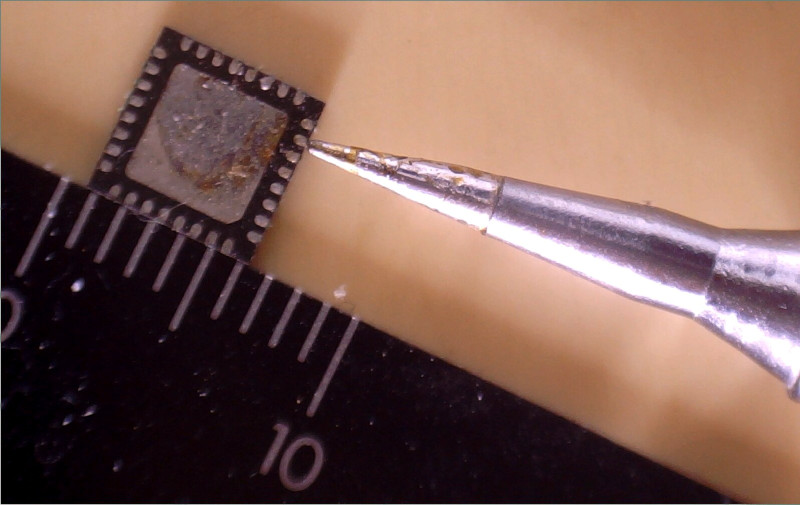
This cartridge tip is rated at a maximum 305 degrees C making it the coolest range available and good for leaded solder. As you can see, the tip is a fine conical about 0.45mm diameter at the tip. Even this very fine tip looks huge under the microscope, so be sure to examine the range of tips available before buying any iron if you are using SMT parts.
The chip is a STM32F051 and the package is 5.3 x 5.3 mm in size, with the pins being 0.30mm wide and 0.50mm apart (on their centerlines).
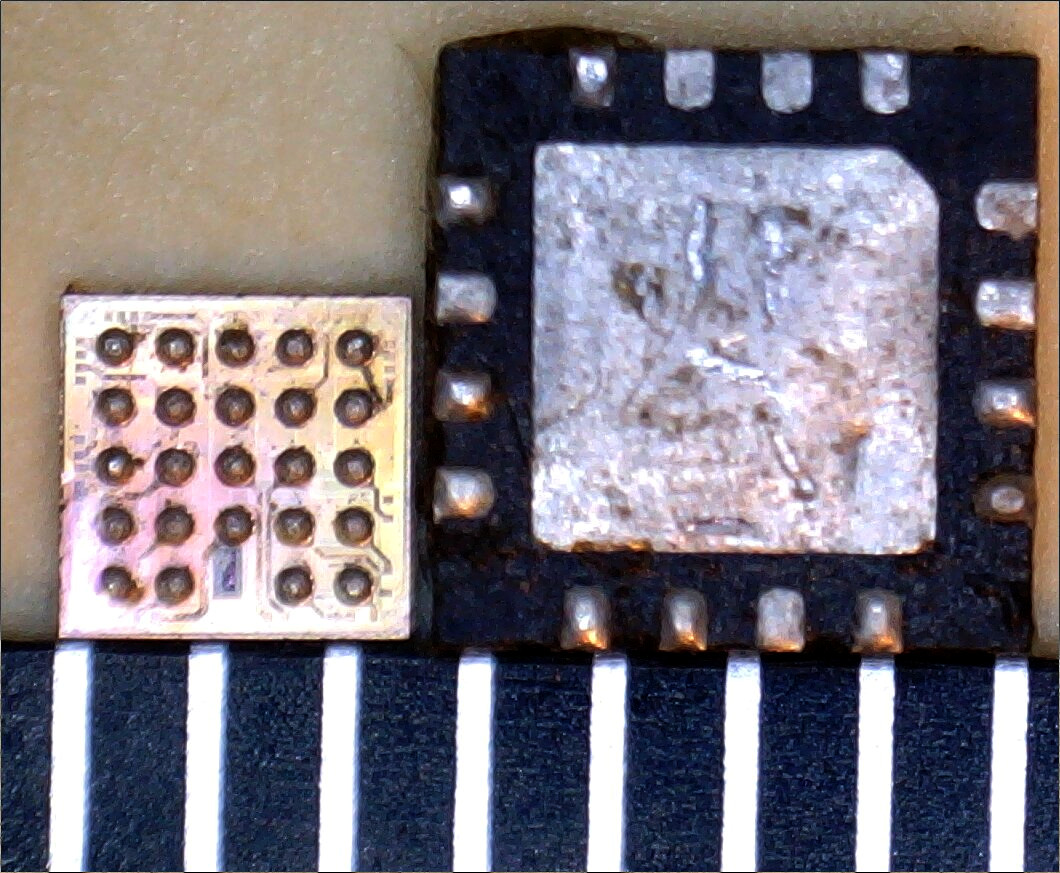
UFQFPN-16 V/S UFQFPN-32
DSBGA-24 V/S UFQFPN-16
This is as good as my 2D $100 USB microscope can do. What you can’t quite see are the DSBGA solder balls standing like towers in shadow and the Matrix like city underneath with millions of golden highways snaking all over the chip surface.
That picture is only available under a decent binocular microscope.
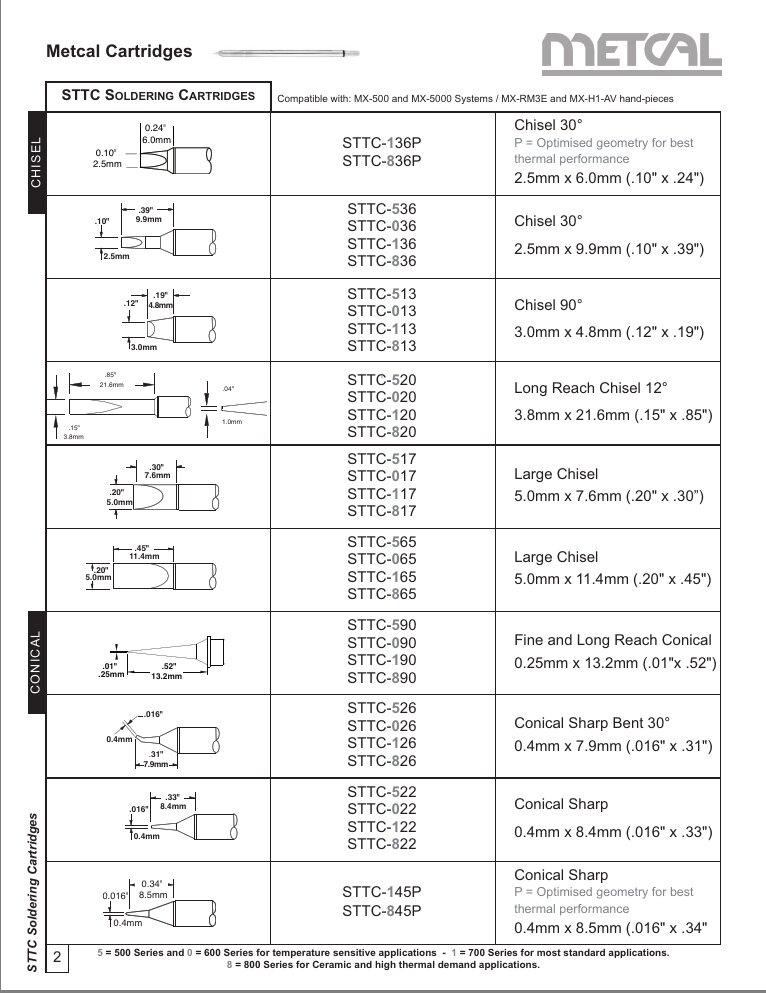
Tip Temperature
Metcal has four temperature ranges for cartridge tips. Be sure to order the ones you want in the right temperature range.
Part No |
Maximum Tip Temperatures |
|---|---|
STTC-5*** |
575°F/302°C |
STTC-0*** |
675°F/357°C |
STTC-1*** |
775°F/413°C |
STTC-8*** |
925°F/496°C |
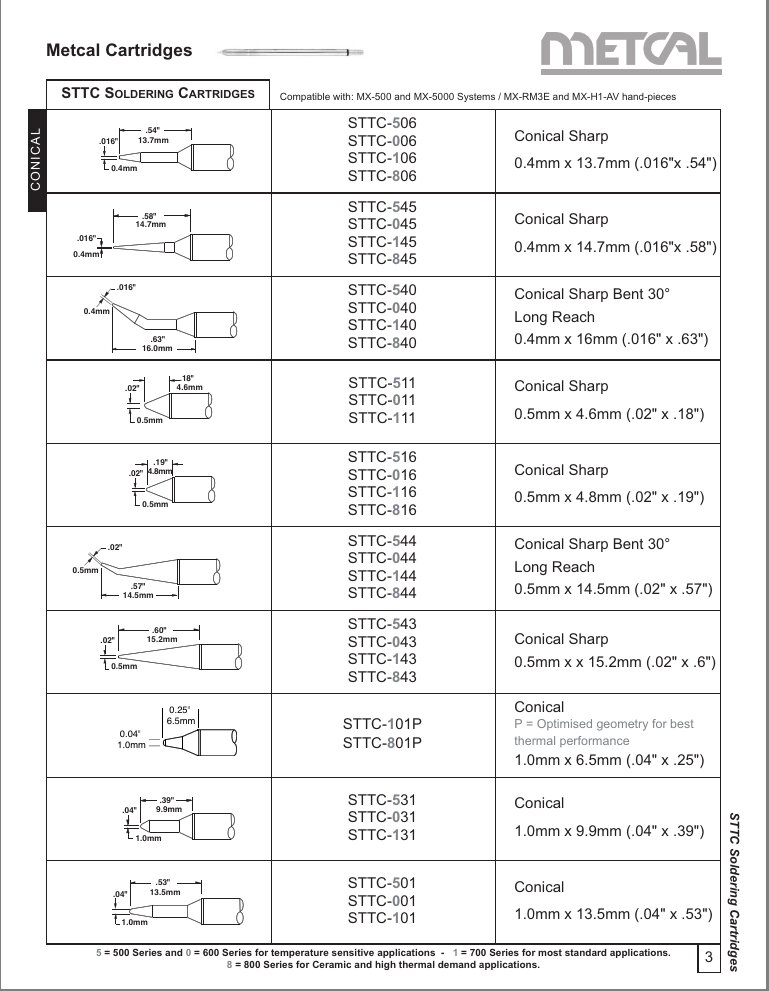
Metcal Tips, Full Range

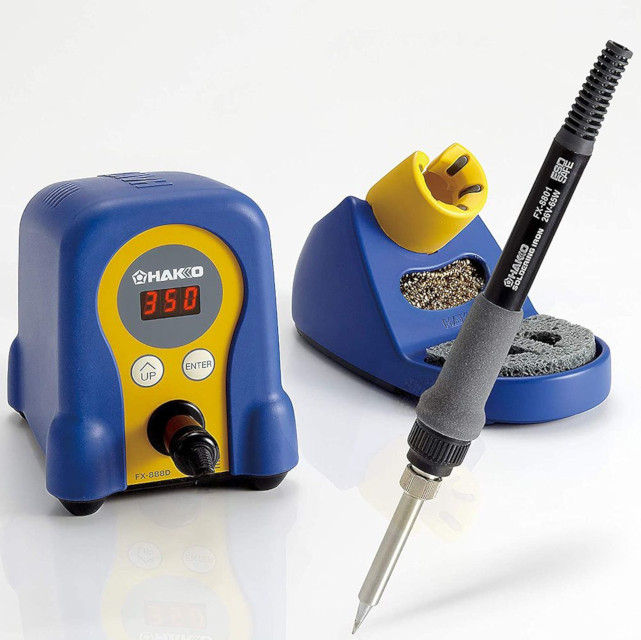
Hakko FX888D
The Hakko FX888D Soldering Station is the upgrade to the original FX888. With an easy to read digital display, Hakko‘s latest model combines reliability, excellent thermal recovery, a range of tips and spares and is very easy to use. As a genuine all-round soldering station, the Hakko FX888D offers a number of features that make it suitable for hobbyists or electronics professionals.
Clear, easy to read digital display
Temperature range from 50 degrees Celsius to 480 degrees Celsius
Excellent thermal recovery
Password protection for temperature settings
Excellent temperature stability of within 1 degree Celsius
Compatible with all original FX888D tips and spares
Uses T18 tips which are NOT cartridge tips. The tips slide over the heater and are held in place with a retaining sleeve and knurled nut.
Priced around $170 AUD.
T18 Tips
Seriously. How good are these tips ?
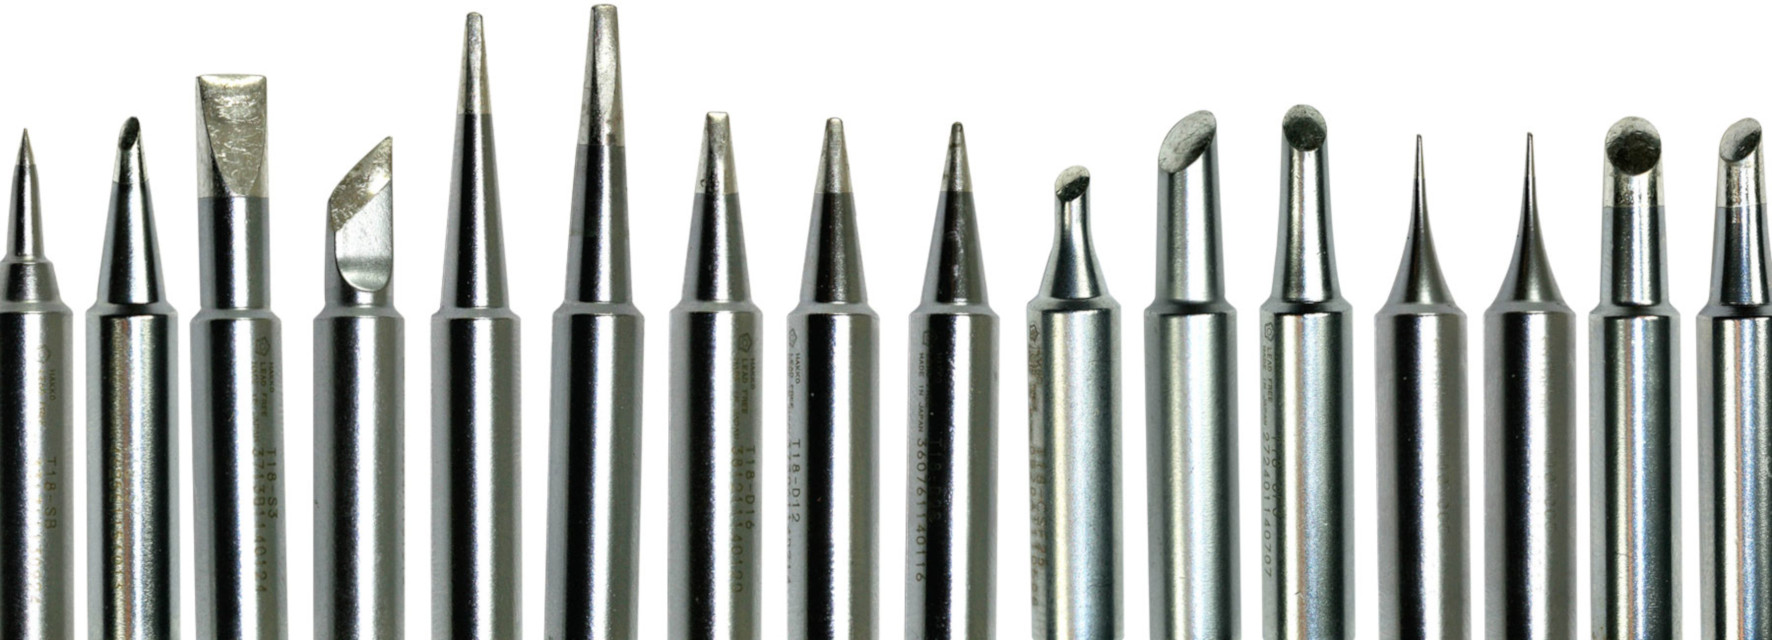
It’s not a cartridge design (see below), the heater stays in the iron (but can be replaced for ~$30) only the tips are changed. The tips slide over the heating element and are held with a sleeve and knurled retaining nut. More difficult to change tips than cartridge type irons, but not that hard.
They are the same level of difficulty to change tips as the very industrial Weller irons I used for decades … i.e. no big deal.

PINECIL Soldering Iron
A dc heater cartridge style soldering iron for those on a budget.
The Pinecil is a USB/2.1mm plug powered mini portable soldering iron that heats up to an operating temperature in about 15 seconds. It features an adjustable soldering tip temperature which can be set between 100Degree C and 400Degree C using the adjustment buttons and OLED display with automatic help.
I haven’t used one, or any TS100 style iron, but my friends have recommended them.
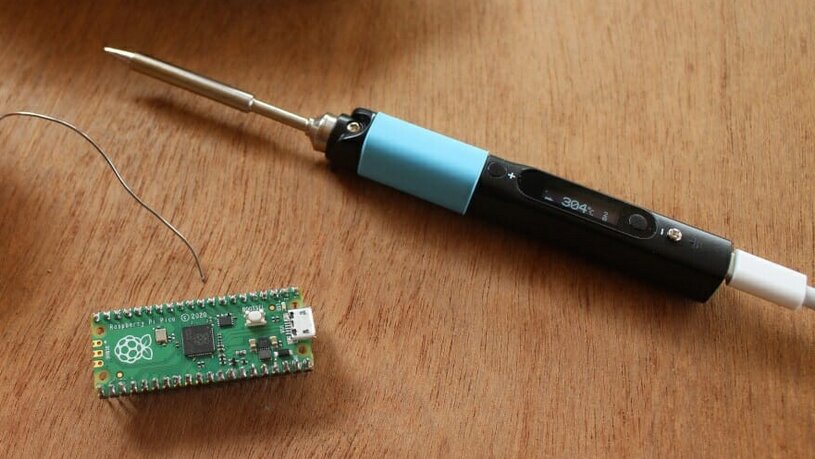
Available everywhere for around $50
Needs a 60W USB psu for fastest operation (~ $60)
Can be used in BOOST mode for extra heat to melt the enamel from copper wires.
Has a cool inbuilt help display
Uses the well designed TS100 soldering iron cartridge tips
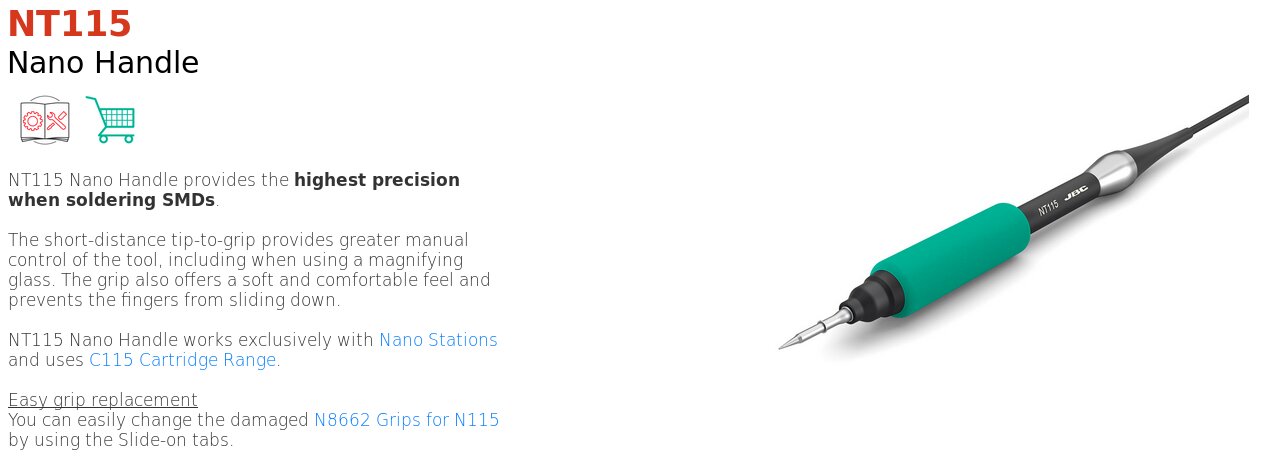
Assemble Your Own Cartridge Iron
Thanks to LeStope who says the JBC is the premier, dc heating, variable temperature iron these days, and gave the following suggestions, to assemble the highest quality iron and controller for MUCH less than buying completete original systems. One can do the following for around a couple of hundred dollars, with the most expensive component being the original JBC handpiece.
Buy a JBC iron handle

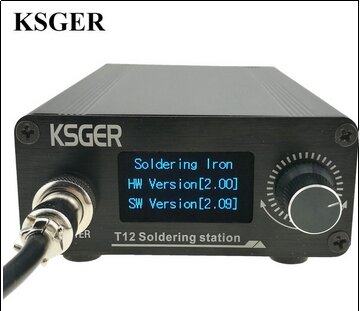
Buy a Cheap Ksger Controller
These have every control option you’ll ever need. You can also get cheap handpieces and cartridges, but they won’t be anywhere the metallurgy of the original JBC tips or the quality of the JBC handpieces. One Chinese handle picture I saw had a external thermistor in the base of the iron, presumably the cold junction compensation. The tip contacts in the base looked a bit flimsy and problematic, which is probably why LeStope said to get the original handpiece and cartridges.
So just get the controller.
https://www.aliexpress.com/store/148611
Warning
The original JBC cartridge tips have superior tip metalurgy, so don’t be fooled by cheaper alternatives.
Useless Diversions
Some people (who claim to know) will strongly advise you to use DIP devices because they’re “easier than Surface Mount”. If you asked them advice on which car to buy to to learn to drive, they would probably recommend a Model A-Ford. Shun such people.
Start with Surface Mount because that tech is already 30 years old and is the CURRENT TECHNOLOGY.
Don’t start with long obsolete tech. SMT has every advantage over DIP.
Soldering SMT is Hard!
When did hard start being a reason to avoid learning elite skills ?
Besides, with the right tools and equipment SMT is easy.
My eyes are 67 years old and I still do ONLY SMT, so I’m pretty sure you can too.
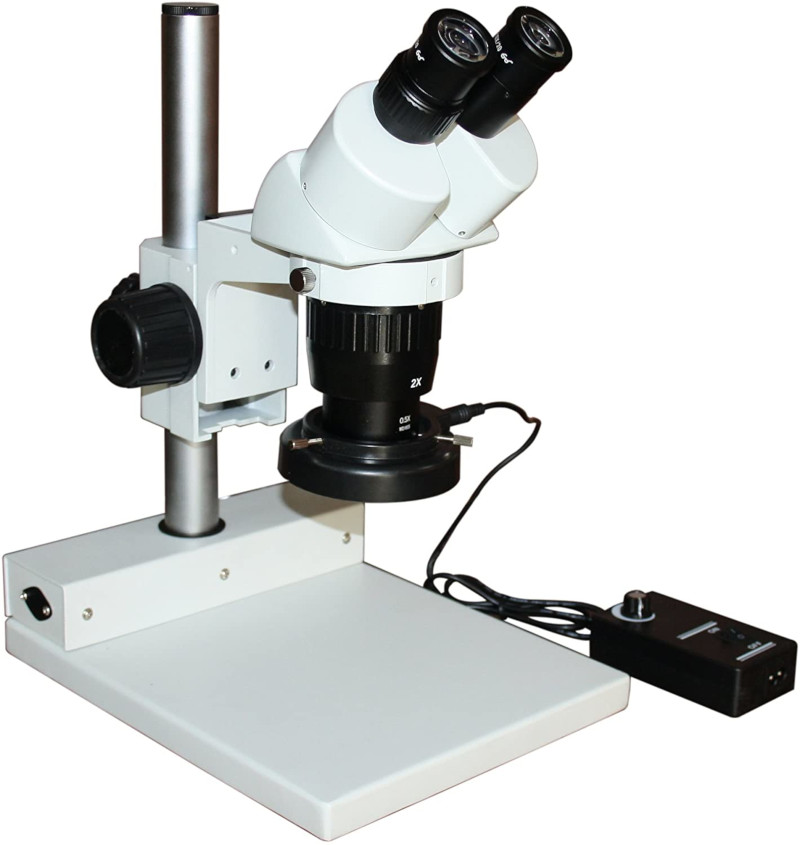
Binocular Microscope
If you can’t see it, you can’t use it.
Youtube video by Strange Parts: How a Binocular Microscope changed the life of a soldering ‘klutz’. If you have ‘unsteady hands’ when soldering perhaps it’s because your visual feedback (hand/eye) loop is not working properly ?
Louis Rossman youtube video on Which Binocular Microscope To Buy
Best Brands: Olympus,Nikon,Canon, Zeiss - these cost megabucks, I bought my second hand Olympus on Ebay a decade ago for $300 AUD without a base or lights etc.
Next best: Ebay, China, be very suspicious, tons of good looking junk about.
This is the Aliexpress advert for the Trinocular in the Strange Parts video above it’s AU $431.58 (Feb 2022) with everything (shipping extra). I haven’t used that machine myself, but it’s a lot cheaper than my second hand Olympus Binocular (only) and stand was. It includes lighting and camera for the Trinocular, and it looks pretty good to me. Yeah, I’d buy one for sure. If you get one, please drop me a email and let me know your opinion ?
But Why A Binocular Microscope?
Why not a USB microscope or a large ring magnifier, or a magnifying glass ?
Depth of field where 0.01 inches in height is VERY important to see.
Large clearance between microscope and pcb for tools and soldering.
No need to burn your nose with the soldering iron!
SMT Soldering Advice
Great SMT soldering advice here: https://geoffg.net/SurfaceMount.html
Vice
You’ll need something to hold the board still under the binocular microscope or it will move around when you work on it, and that is incredibly annoying.
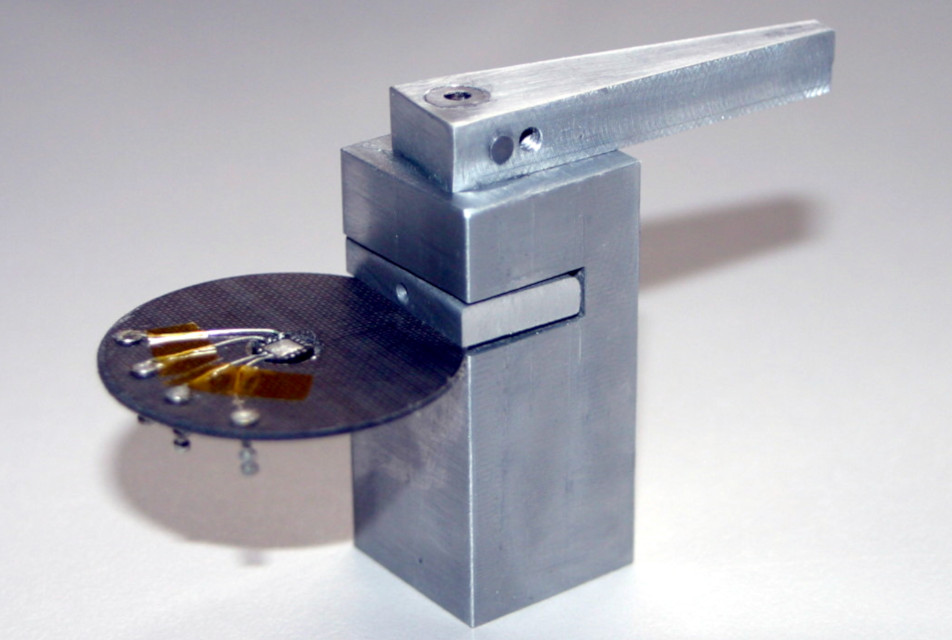
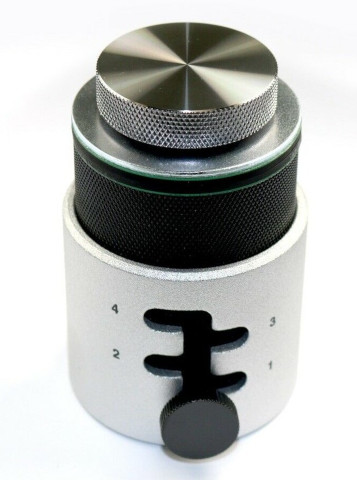
Home Made PCB Vice
Version 1.0
It’s designed for soldering and working on small boards under a Binocular Microscope, with the board facing up.
Turning the arm one quarter turn clockwise lowers the ‘foot’ onto the pcb and locks it so it can’t move. Only a 3mm deep ‘bite’ of the edge of the pcb is required. Made on a lathe and milling machine, Version 2.0 is coming soon.
Commercial Alternative
The Hakko Omnivice is much larger, but works in a similar way to clamp the board in a horizontal position, facing up. It costs about $60.
Multimeter
There are a zillion models, there are far too many excellent brands to list, and better is always more expensive.
I included the picture so you can see the kind of features I consider useful. My meter is about 10 years old now, looks like new and I haven’t (yet) managed to blow it up.
It is internally fully fused with quick-blow fuses.
My Meter

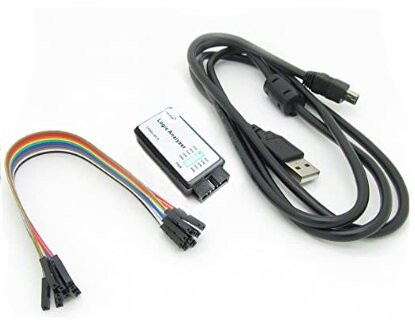
Logic Analyser
These used to be massive boxes, very expensive, but much has changed. Nowadays a cheap $5, 8 channel USB Saleae Clone will display 20 MHz signals with a PC, and Sigrock .
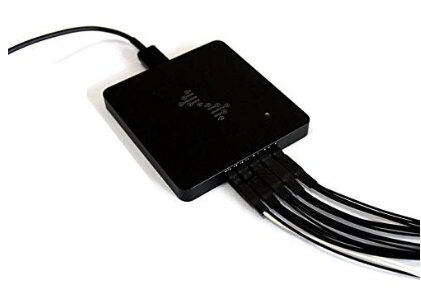
Costing more, my goto unit is a DreamSourceLab DSLogic USB unit. This is beautifully made, works at 400MHz, has a aluminium case and excellent probes. It has its own software based on Sigrock.
Oscilloscope
The DSOs We all Dream of Owning
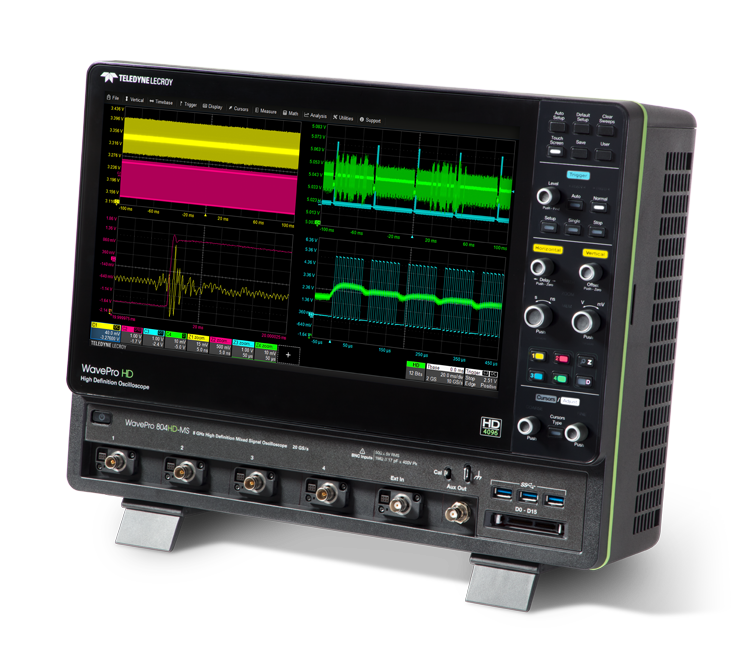
You can get by without one, especially in digital electronics where you can use a USB Logic analyser. However all serious electronics people have a ‘scope’. I have this one.
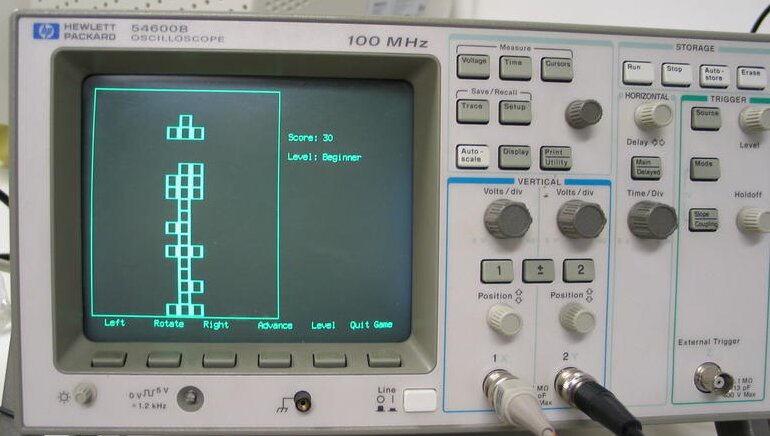
My scope was new in 1994, it’s a Hewlett Packard 54601A, 100MHZ, 4 channel DSO. I paid $4600 AUD for it as a demo and I still use it today as my only DSO. I also bought the optional analog training module, removable front cover and RS232 module which made the image below on this PC. It even has “Tetris” built in!
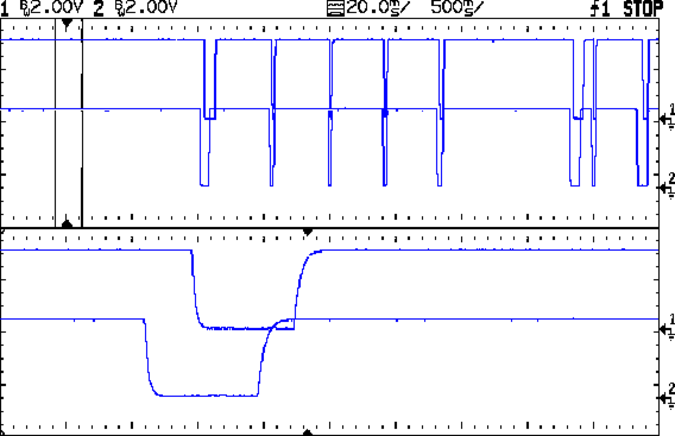
HP 54601A Waveform Capture
This waveform shows the normal and delayed view of a cheap Chinese Quadrature Rotary Switch as it is rotated.
Amortization ?
Looking back, it’s now 2022, so that scope is 28 years old, still perfect, looks like new (thanks to the removable front cover) and has cost me $164 dollars a year to this point. It came with high quality manuals in binders, test software and four high quality HP scope leads, not the junk that comes with cheap ($1200) Chinese scopes today.
The bottom line ? If you are young and know you’ll be doing electronics all your life, buy that awesome $10,000 scope now, (get a loan over 5 years like I did) and 40 years later it will have cost you only $250 a year.
In 1970, I could buy for 20 cents, more fish and chips than two adults could eat, what do you think $250 will buy you in 2062 ?
And you will have had a awesome scope to use, 24 hrs a day, 7 days a week for the rest of your working life and into retirement.